Braintree Apple Pay
Introduction
Braintree for WooCommerce is a Wordpress plugin that integrates your Braintree and PayPal accounts with WooCommerce
The goal of the plugin is to provide all the tools a shop owner needs to accept payments effectively. Our plugin offers many of the most popular payment methods including credit cards, PayPal, Google Pay, Apple Pay, and Venmo.
Conversion Rate
Our plugin is designed to super charge your conversion rate by allowing you to control payment methods offered on your product pages, cart page, and checkout page.
Our payment options allow your customer’s billing and shipping fields to be auto-populated, which saves them time and decreases customer friction.
Customizable
Our focus has been to make the plugin not only easy to setup, but highly customizable for shop owners that need to tweak the plugin. While the out of the box look and feel works for most shop owners, our solution allows you to customize the look and feel of all UI views rendered by the plugin.
Tons of filters and actions exist so developers can enhance the functionality. Our documentation on how to customize is detailed and provides examples.
https://docs.paymentplugins.com/wc-braintree/config/#/plugin_explanation
Overview
Several steps are required in order to process Apple Pay transactions through a Braintree gateway account. The steps are done both through Braintree as well as Apple. Braintree provides an in-depth guide on Apple Pay configuration and development details. This overview is an abbreviated version for account setup only. Let's get started.
Requirements
The basic requirements are:
- Braintree gateway account
- Apple developer account

The steps are the same for both Sandbox as well as Production – with the exception that the production Braintree gateway account must be provisioned appropriately (through underwriting).
Setup
Summary
Several steps are required for Apple Pay enablement on a Braintree gateway account. The steps start in the Braintree control panel, and you will jump to Apple Developer portal – and them back to Braintree. Here is a summary of the steps. Details follow in subsequent sections:
Step 1: Enable Apple Pay In the Braintree Control Panel
- Enable Apple Pay in the Braintree control panel
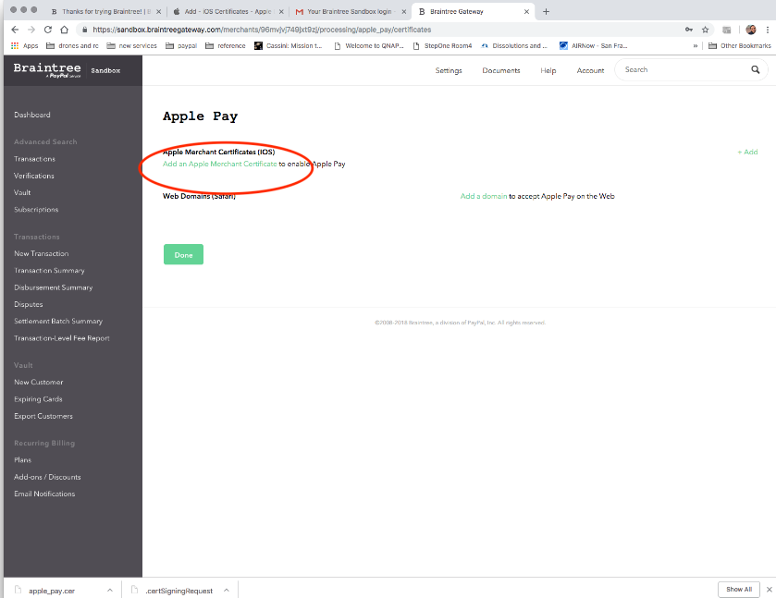
- Add an Apple Merchant Certificate
- Download the Certificate Signing Request (CSR)
Step 2: Create a Merchant ID and Certificate In the Apple Developer Center
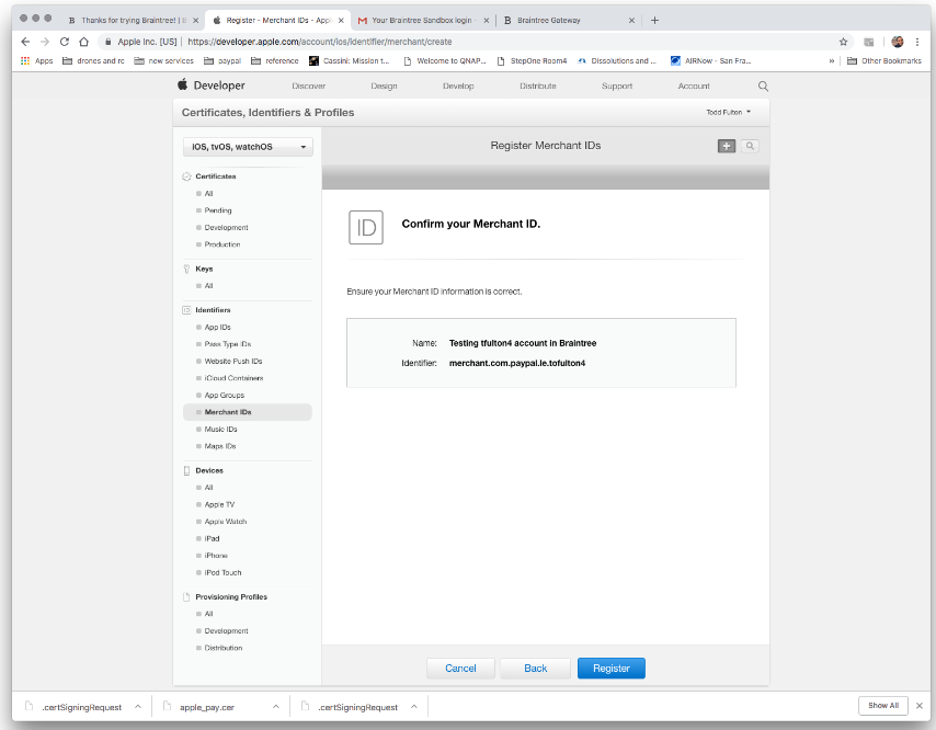
- Create a merchant ID
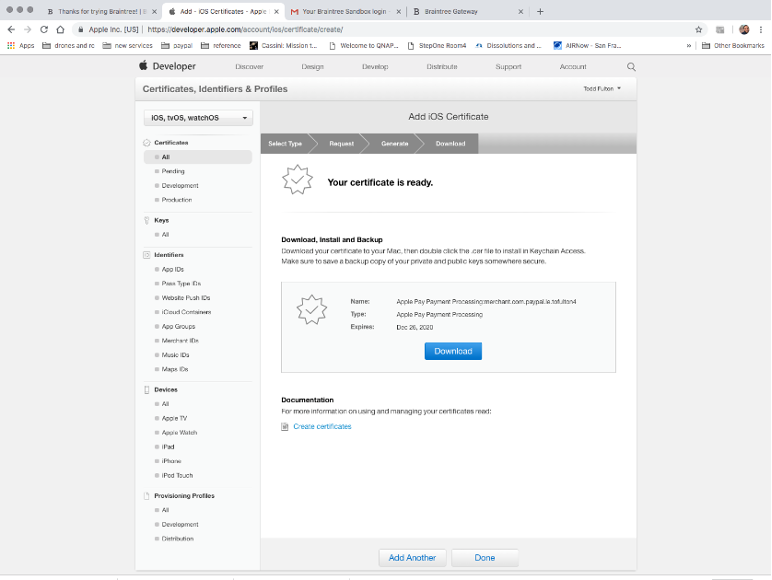
- Add a Apple Pay Payment Processing Certificate (use the CSR created in the Braintree control panel)
Step 3: Register Certificate and Domain In the Braintree Control Panel
- Upload the Certificate from Apple
- Register a Web Domain
Details Steps
Step 1: Enable Apple Pay In the Braintree Control Panel
- Login to the Braintree control panel
- Navigate to Settings >> Processing
- Enable the Apple Pay toggle – you will be brought into the Apple specific settings (or, click the "Options" link if you are not redirected)
- Download a Certificate Signing Request (CSR) from Braintree
Screen Captures for Enable Apple Pay in Braintree Control Panel
Step 2: Create a Merchant ID and Certificate In the Apple Developer Center
- Login to https://developer.apple.com
- Go to Certificates, IDs & Profiles
- Click Certificates >> All
- Add iOS Certificate (use + icon)
- Choose Apple Pay Payment Processing Certificate (its in Production section, same for sandbox/production)
- Continue >> choose the merchant ID you created
- Create Apple Pay Payment Processing Certificate
- Skip selection re China (unless you are processing in China, not covered here)
- View "About Creating a Certificate Signing Request" (CSR) and proceed as you will already have a CSR from Braintree at this point
- Upload CSR file you created in Braintree control panel
- Download, Install and Backup your new certificate
Screen Captures for Creating Apple Merchant ID
Screen Captures for Creating Apple Pay Payment Processing Certificate
Step 3: Add Certificate and Register Domain In the Braintree Control Panel
The hard part done, let's complete the process. From the Braintree control panel:
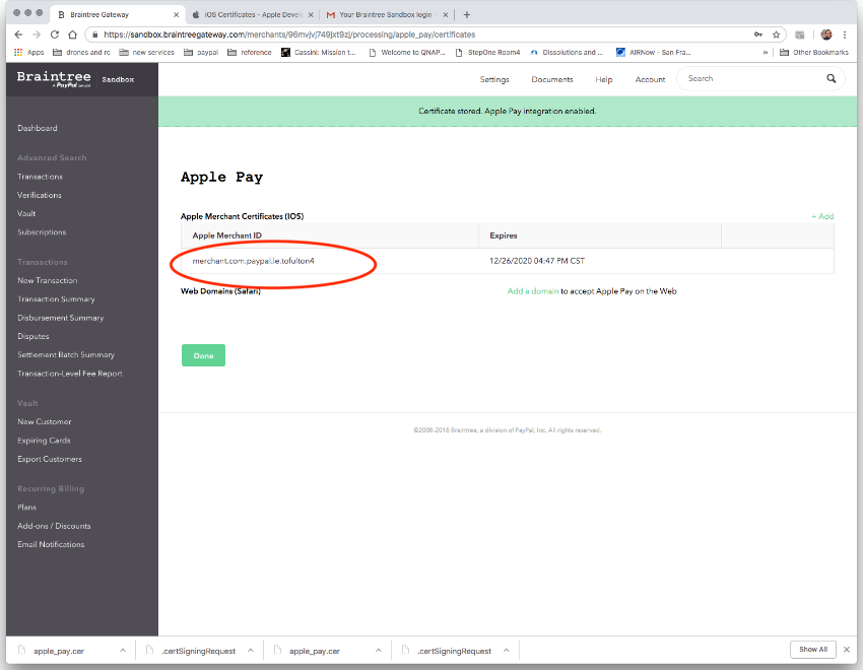
Add the Apple Pay Processing Certificate
- Navigate to the Apple Pay "Options"
- Upload the new certificate into the Braintree control panel
- We now have our certificate registered
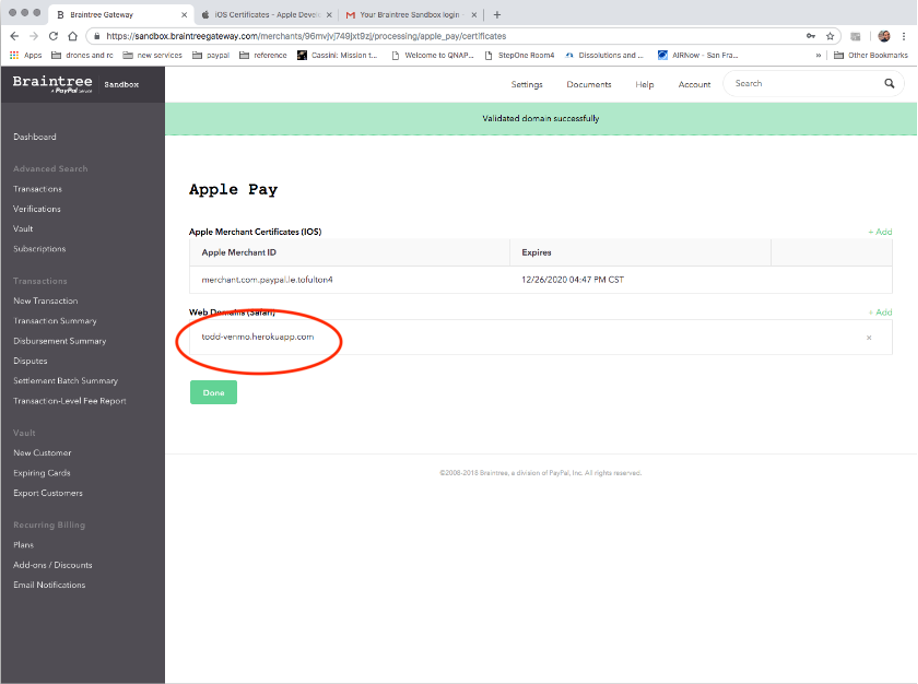
Register Web Domain
- Click "Add a domain" in the Apple Pay "Options" section
- Fill in the domain, including subdomain identifier in the input provided
- Click "Agree & Add Domain"
- We now have our domain registered with Apple (Braintree essentially calls an Apple API to register the domain with Apple)
Screen Captures for Add Certificate and Register Domain
Braintree Apple Pay Resources
