PayPal Payment Links & Buttons – Godaddy Website Marketing

How to Implement the Alternative Payment Method with Godaddy Website & Marketing Builder
- Generate the Correct Code Snippet from PayPal
- Log in to your PayPal account.
- Navigate to their tools section to create a button and select the option to get the standard HTML embed code.
- Add to GoDaddy Website Builder
- Sign in to your GoDaddy product page and go to your Website Builder editor.
- Navigate to the page where you want the button.
- Click the Add Section button where you want the content to appear.
- Search for HTML in the Files & Web category and select Add.
- In the Custom Code field, paste the entire HTML snippet you copied from PayPal.
- Leave the Forced Height field blank for auto-height or set a height in pixels if needed.
- Preview and Publish
- Use the Preview function to check that the button appears and functions correctly.
- Publish your site to make the changes live to visitors.
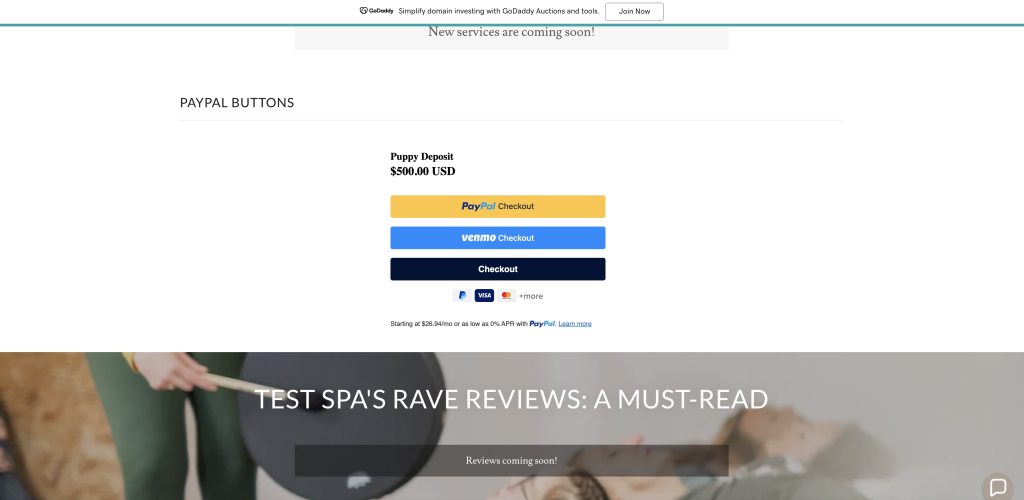
Demo Godaddy Website & Marketing Site
How to Implement the Alternative Payment Method button with Godaddy Website & Marketing Builder
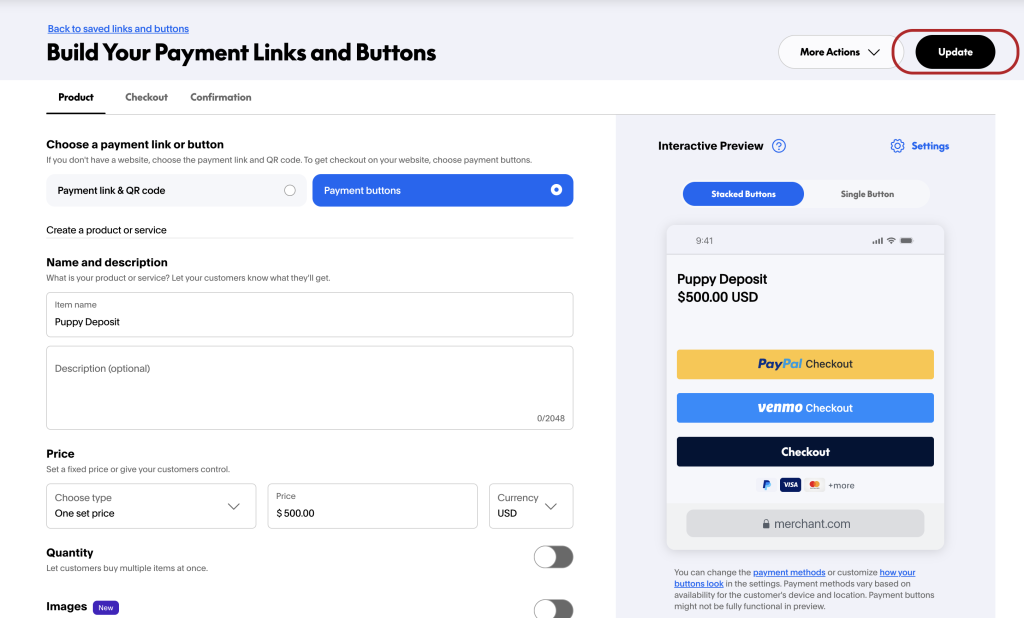
Create your PayPal No Code Payment button
Click Build It or Update button
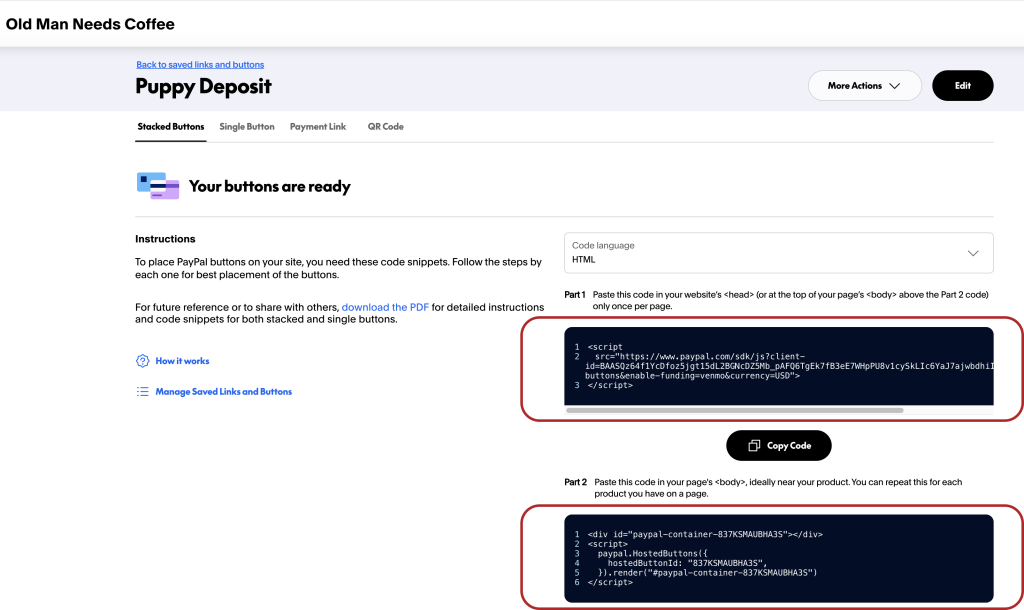
Copy your generated code from Part 1 and Part 2 to be used within Godaddy Website & Marketing
Log into your Godaddy Website & Marketing design area
- Generate the Correct Code Snippet from PayPal
- Log in to your PayPal account.
- Navigate to their tools section to create a button and select the option to get the standard HTML embed code.
- Add to GoDaddy Website Builder
- Sign in to your GoDaddy product page and go to your Website Builder editor.
- Navigate to the page where you want the button.
- Click the Add Section button where you want the content to appear.
- Search for HTML in the Files & Web category and select Add.
- In the Custom Code field, paste the entire MODIFIED HTML snippet you copied from PayPal that includes extra HTMl formatting.
- Leave the Forced Height field blank for auto-height or set a height in pixels if needed.
- Modify PayPal Button Code
- Create the standard boilerplate code for a basic webpage and include PayPal Code Part 1 & Part 2 (see below)
- Paste modified code into Godaddy Website & Marketing
- Preview and Publish
- Use the Preview function to check that the button appears and functions correctly.
- Publish your site to make the changes live to visitors.
Example Pre-formatted Code for Godaddy includes buttons and Pay Later messaging
Buttons with Pay Later Messaging
<!DOCTYPE html>
<html>
<head>
<script
src="https://www.paypal.com/sdk/js?client-id=BAASQz64f1YcDfoz5jgt15dL2BGNcDZ5Mb_pAFQ6TgEk7fB3eE7WHpPU8v1cySkLIc6YaJ7ajwbdhiICCM&components=hosted-buttons&enable-funding=venmo¤cy=USD">
</script>
</head>
<body>
<div style="display: block; width: 450px; margin: 0 auto;">
<div id="paypal-container-837KSMAUBHA3S" style="width: 450px;"></div>
<script>
paypal.HostedButtons({
hostedButtonId: "837KSMAUBHA3S",
}).render("#paypal-container-837KSMAUBHA3S")
</script>
<script
src="https://www.paypal.com/sdk/js?client-id=AS0S2ZuCHmdpJA1U-rXnTZajSeD3z2jZuV9kzkP1sOBVn_to8FFeGPSzQ31PxCke3PxGUQ4YgJm58Ol6&components=messages"
data-namespace="PayPalSDK">
</script>
<div
data-pp-message
data-pp-style-layout="text"
data-pp-style-logo-type="inline"
data-pp-style-text-color="black"
data-pp-amount="500.00"
data-pp-language="">
</div>
</div>
</body>
</html>