Overview
Several steps are required in order to process Apple Pay transactions through a Braintree gateway account. The steps are done both through Braintree as well as Apple. Braintree provides an in-depth guide on Apple Pay configuration and development details. This overview is an abbreviated version for account setup only. Let’s get started.
Requirements
The basic requirements are:
- Braintree gateway account
- Apple developer account

The steps are the same for both Sandbox as well as Production – with the exception that the production Braintree gateway account must be provisioned appropriately (through underwriting).
Setup
Summary
Several steps are required for Apple Pay enablement on a Braintree gateway account. The steps start in the Braintree control panel, and you will jump to Apple Developer portal – and them back to Braintree. Here is a summary of the steps. Details follow in subsequent sections:
Step 1: Enable Apple Pay In the Braintree Control Panel
- Enable Apple Pay in the Braintree control panel
- Add an Apple Merchant Certificate
- Download the Certificate Signing Request (CSR)
Step 2: Create a Merchant ID and Certificate In the Apple Developer Center
- Create a merchant ID
- Add a Apple Pay Payment Processing Certificate (use the CSR created in the Braintree control panel)
Step 3: Register Certificate and Domain In the Braintree Control Panel
- Upload the Certificate from Apple
- Register a Web Domain
Details Steps
Step 1: Enable Apple Pay In the Braintree Control Panel
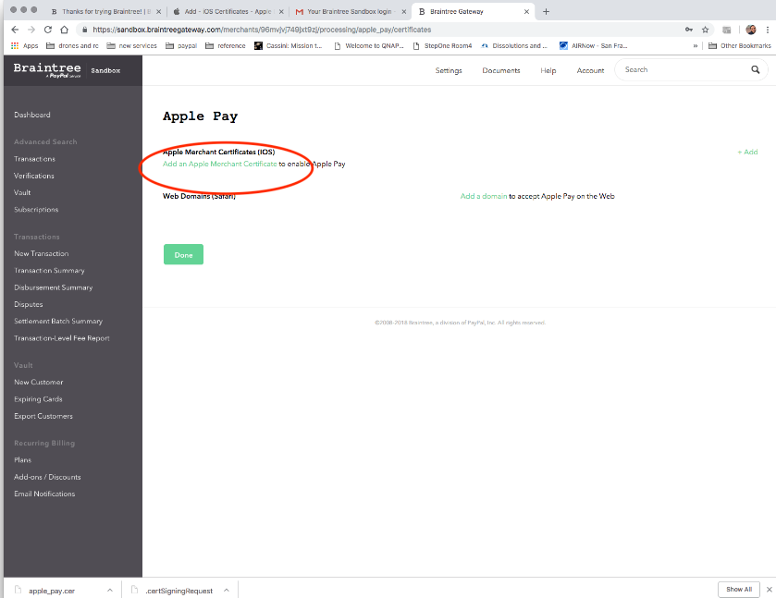
- Login to the Braintree control panel
- Navigate to Settings >> Processing
- Enable the Apple Pay toggle – you will be brought into the Apple specific settings (or, click the “Options” link if you are not redirected)
- Download a Certificate Signing Request (CSR) from Braintree
Screen Captures for Enable Apple Pay in Braintree Control Panel
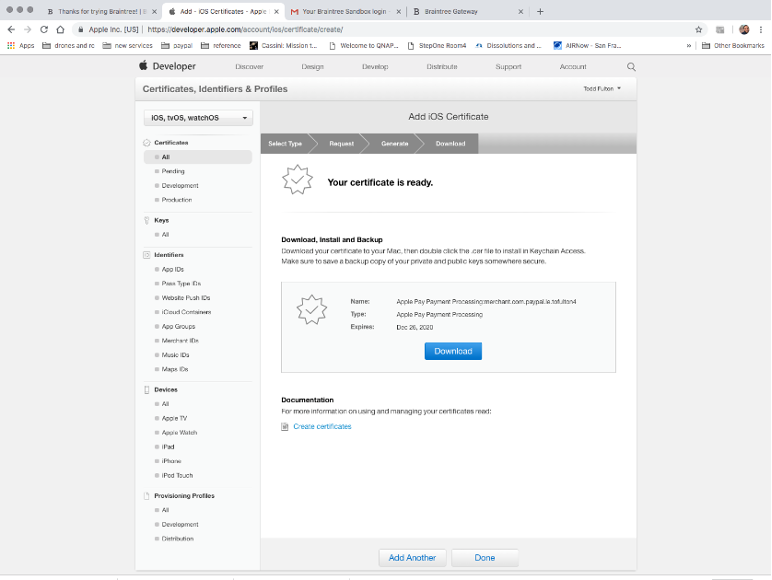
Step 2: Create a Merchant ID and Certificate In the Apple Developer Center
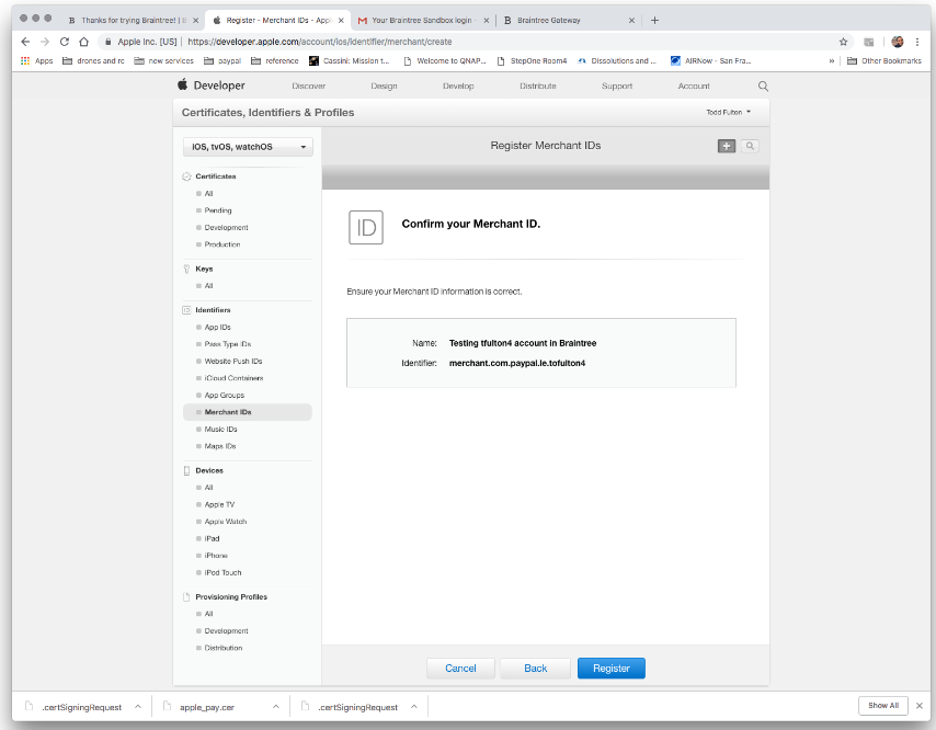
- Login to https://developer.apple.com
- Go to Certificates, IDs & Profiles
- Click Certificates >> All
- Add iOS Certificate (use + icon)
- Choose Apple Pay Payment Processing Certificate (its in Production section, same for sandbox/production)
- Continue >> choose the merchant ID you created
- Create Apple Pay Payment Processing Certificate
- Skip selection re China (unless you are processing in China, not covered here)
- View “About Creating a Certificate Signing Request” (CSR) and proceed as you will already have a CSR from Braintree at this point
- Upload CSR file you created in Braintree control panel
- Download, Install and Backup your new certificate
Screen Captures for Creating Apple Merchant ID
Screen Captures for Creating Apple Pay Payment Processing Certificate
Step 3: Add Certificate and Register Domain In the Braintree Control Panel
The hard part done, let’s complete the process. From the Braintree control panel:
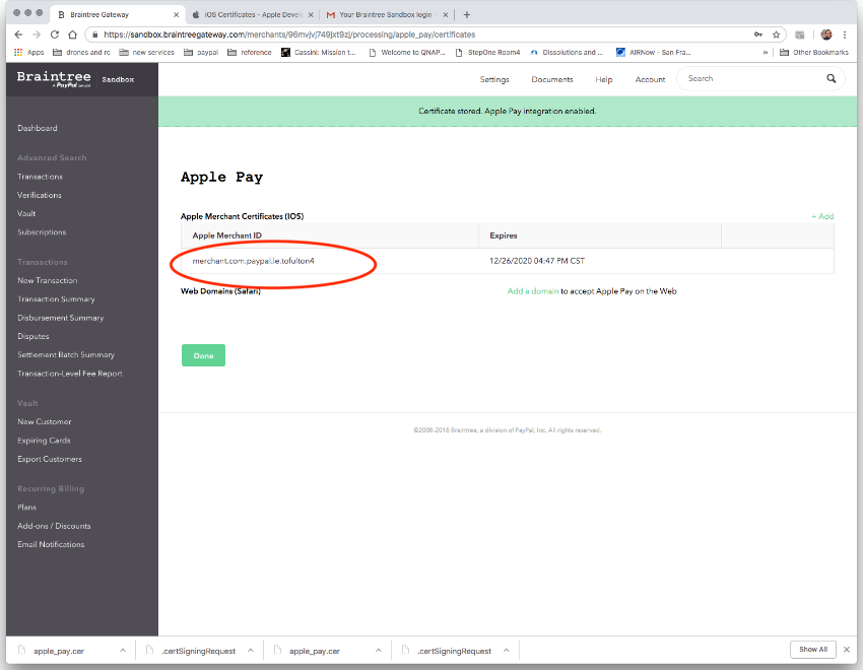
Add the Apple Pay Processing Certificate
- Navigate to the Apple Pay “Options”
- Upload the new certificate into the Braintree control panel
- We now have our certificate registered
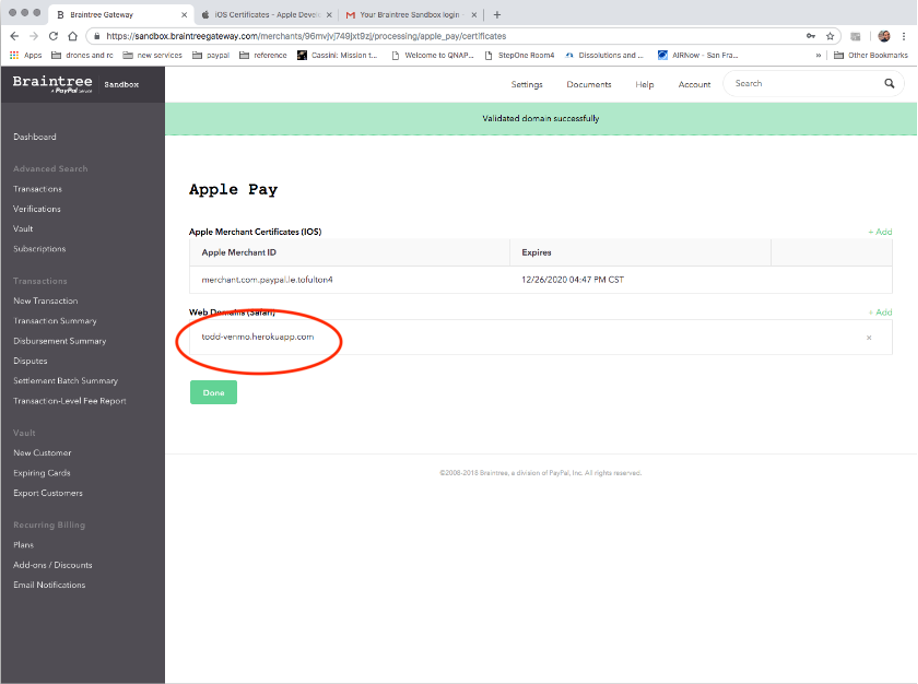
Register Web Domain
- Click “Add a domain” in the Apple Pay “Options” section
- Fill in the domain, including subdomain identifier in the input provided
- Click “Agree & Add Domain”
- We now have our domain registered with Apple (Braintree essentially calls an Apple API to register the domain with Apple)
Screen Captures for Add Certificate and Register Domain